

Let’s take a look at my plan again:
We kept the skeleton of the old frame (purple lines)
We’ve done the footers (all the numbers)
We’ve expanded the frame (green line)
So now it’s time to move onto the orange support beams and the blue beams that support the actual flooring.
What I didn’t draw on here is all the cross-pieces that you always see in framing to keep anything from twisting. (I didn’t draw them on, but you’ll see them in the pictures)

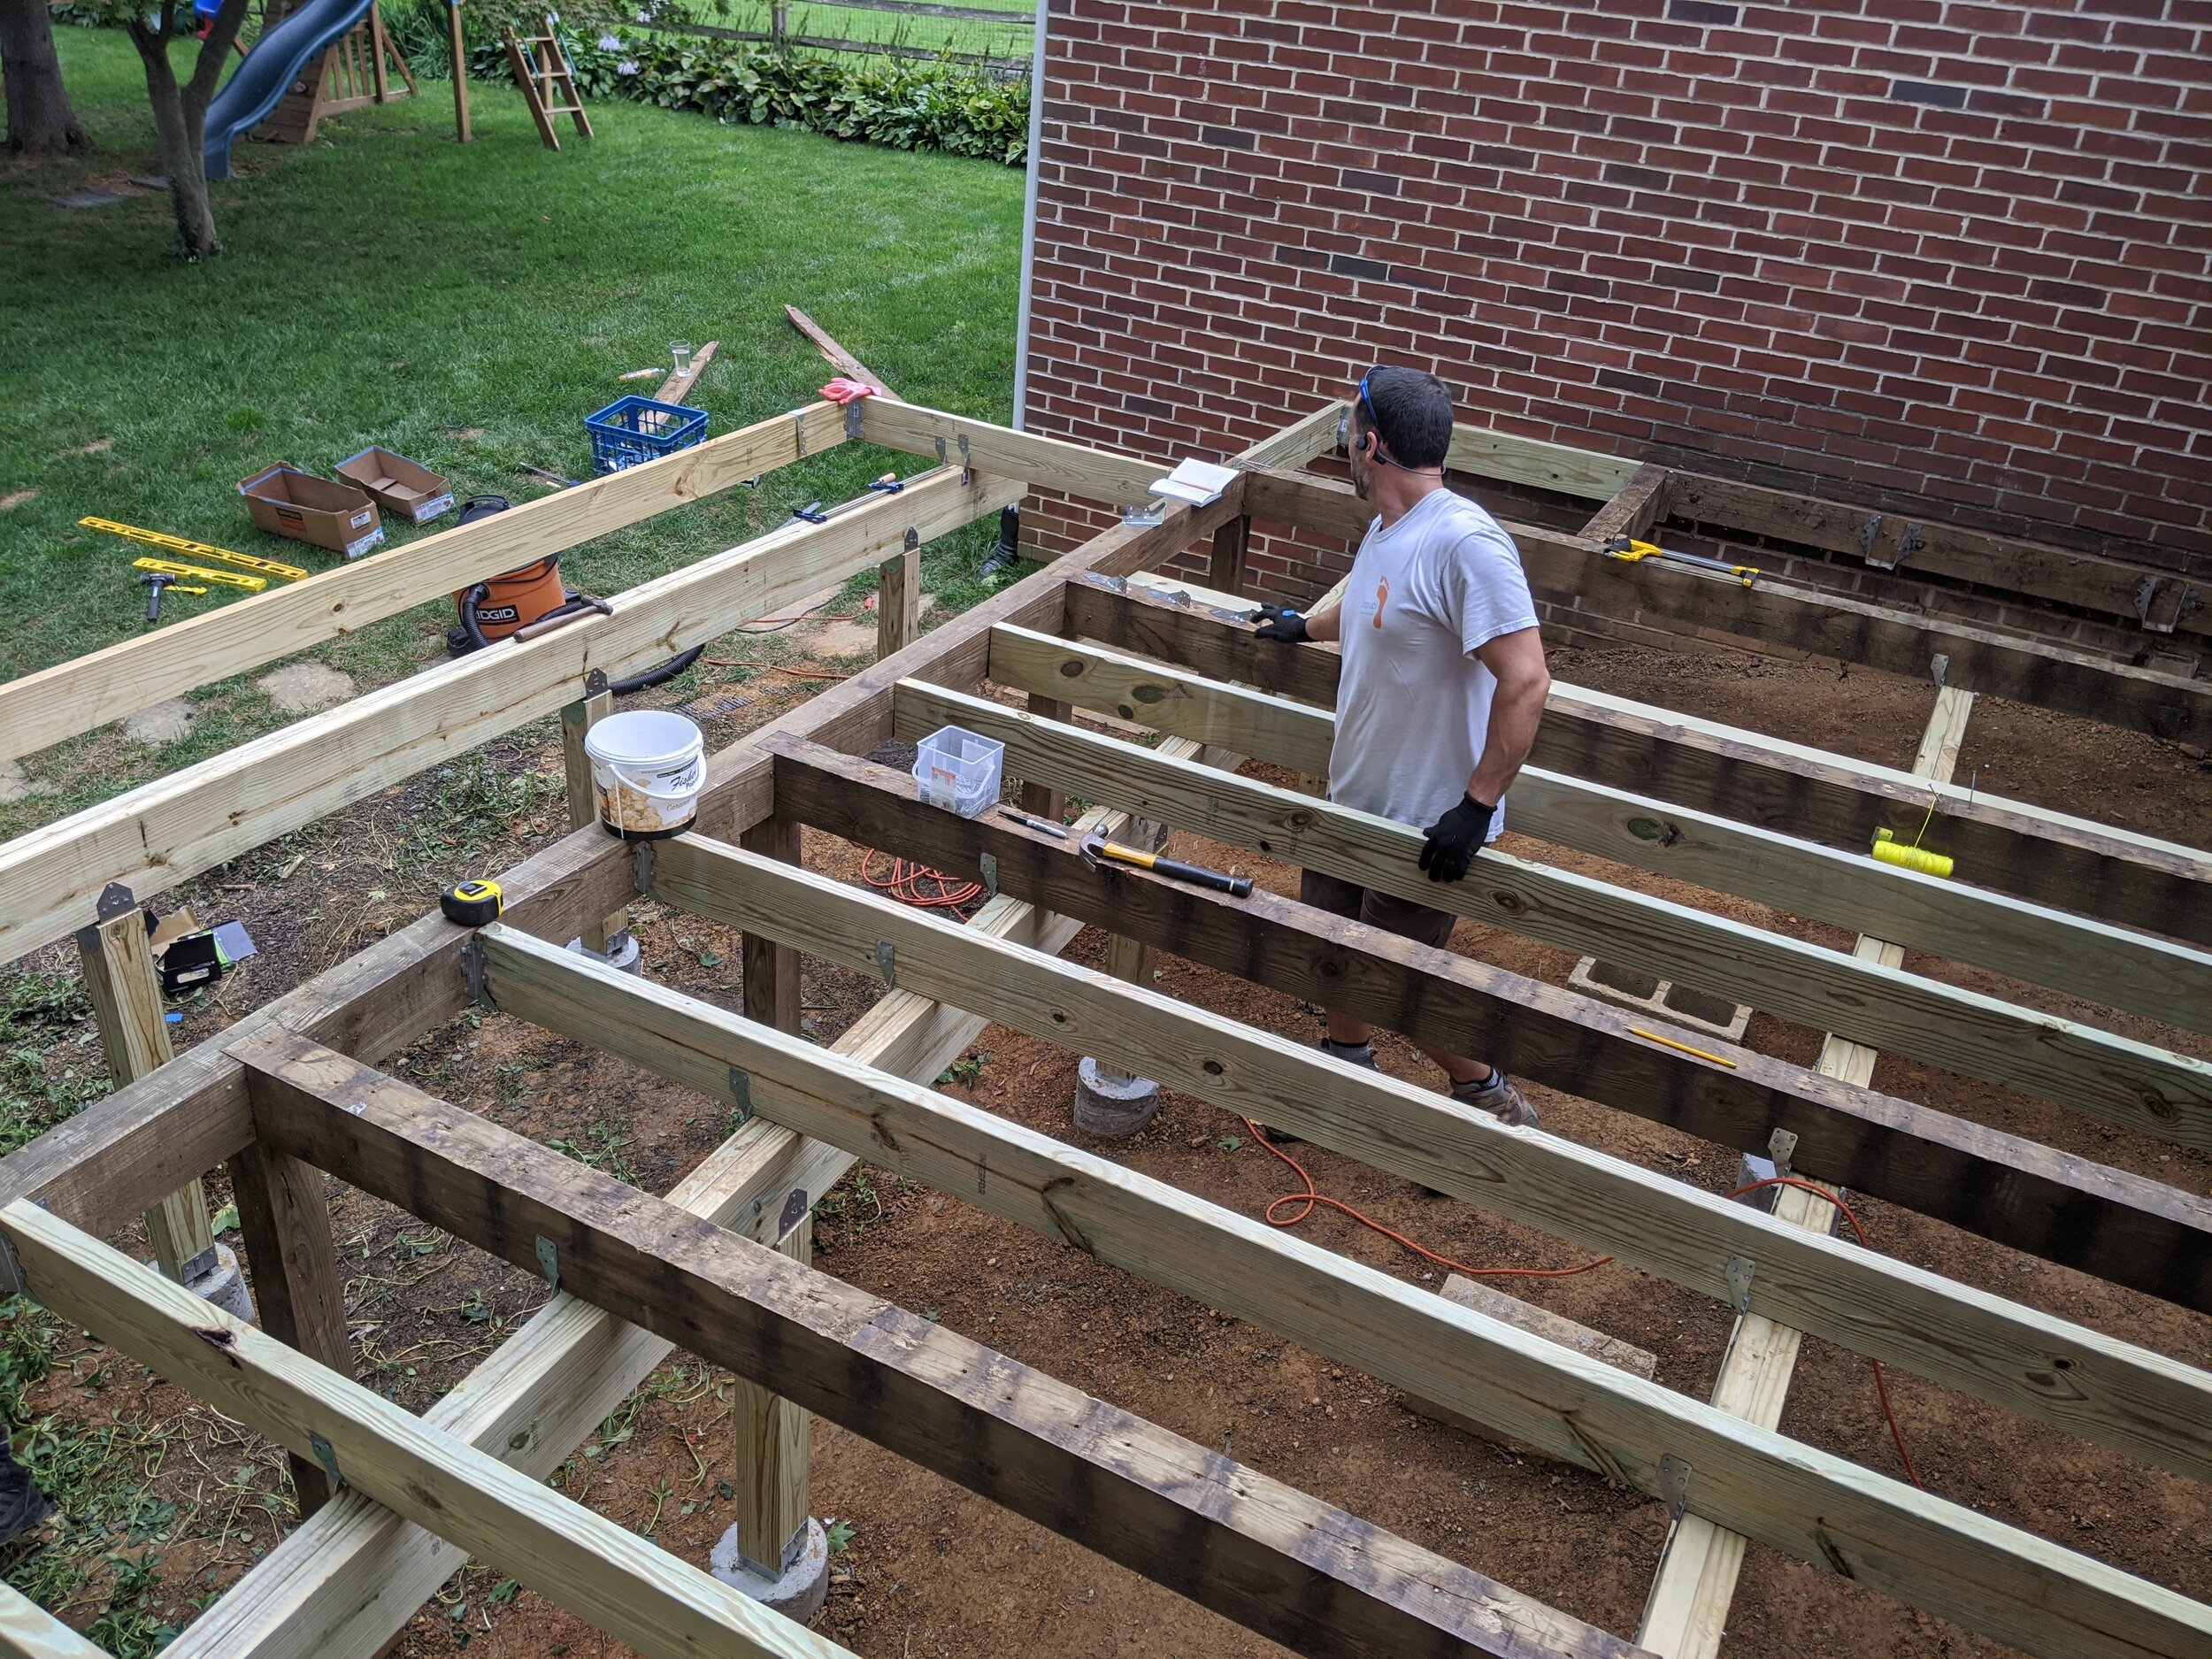
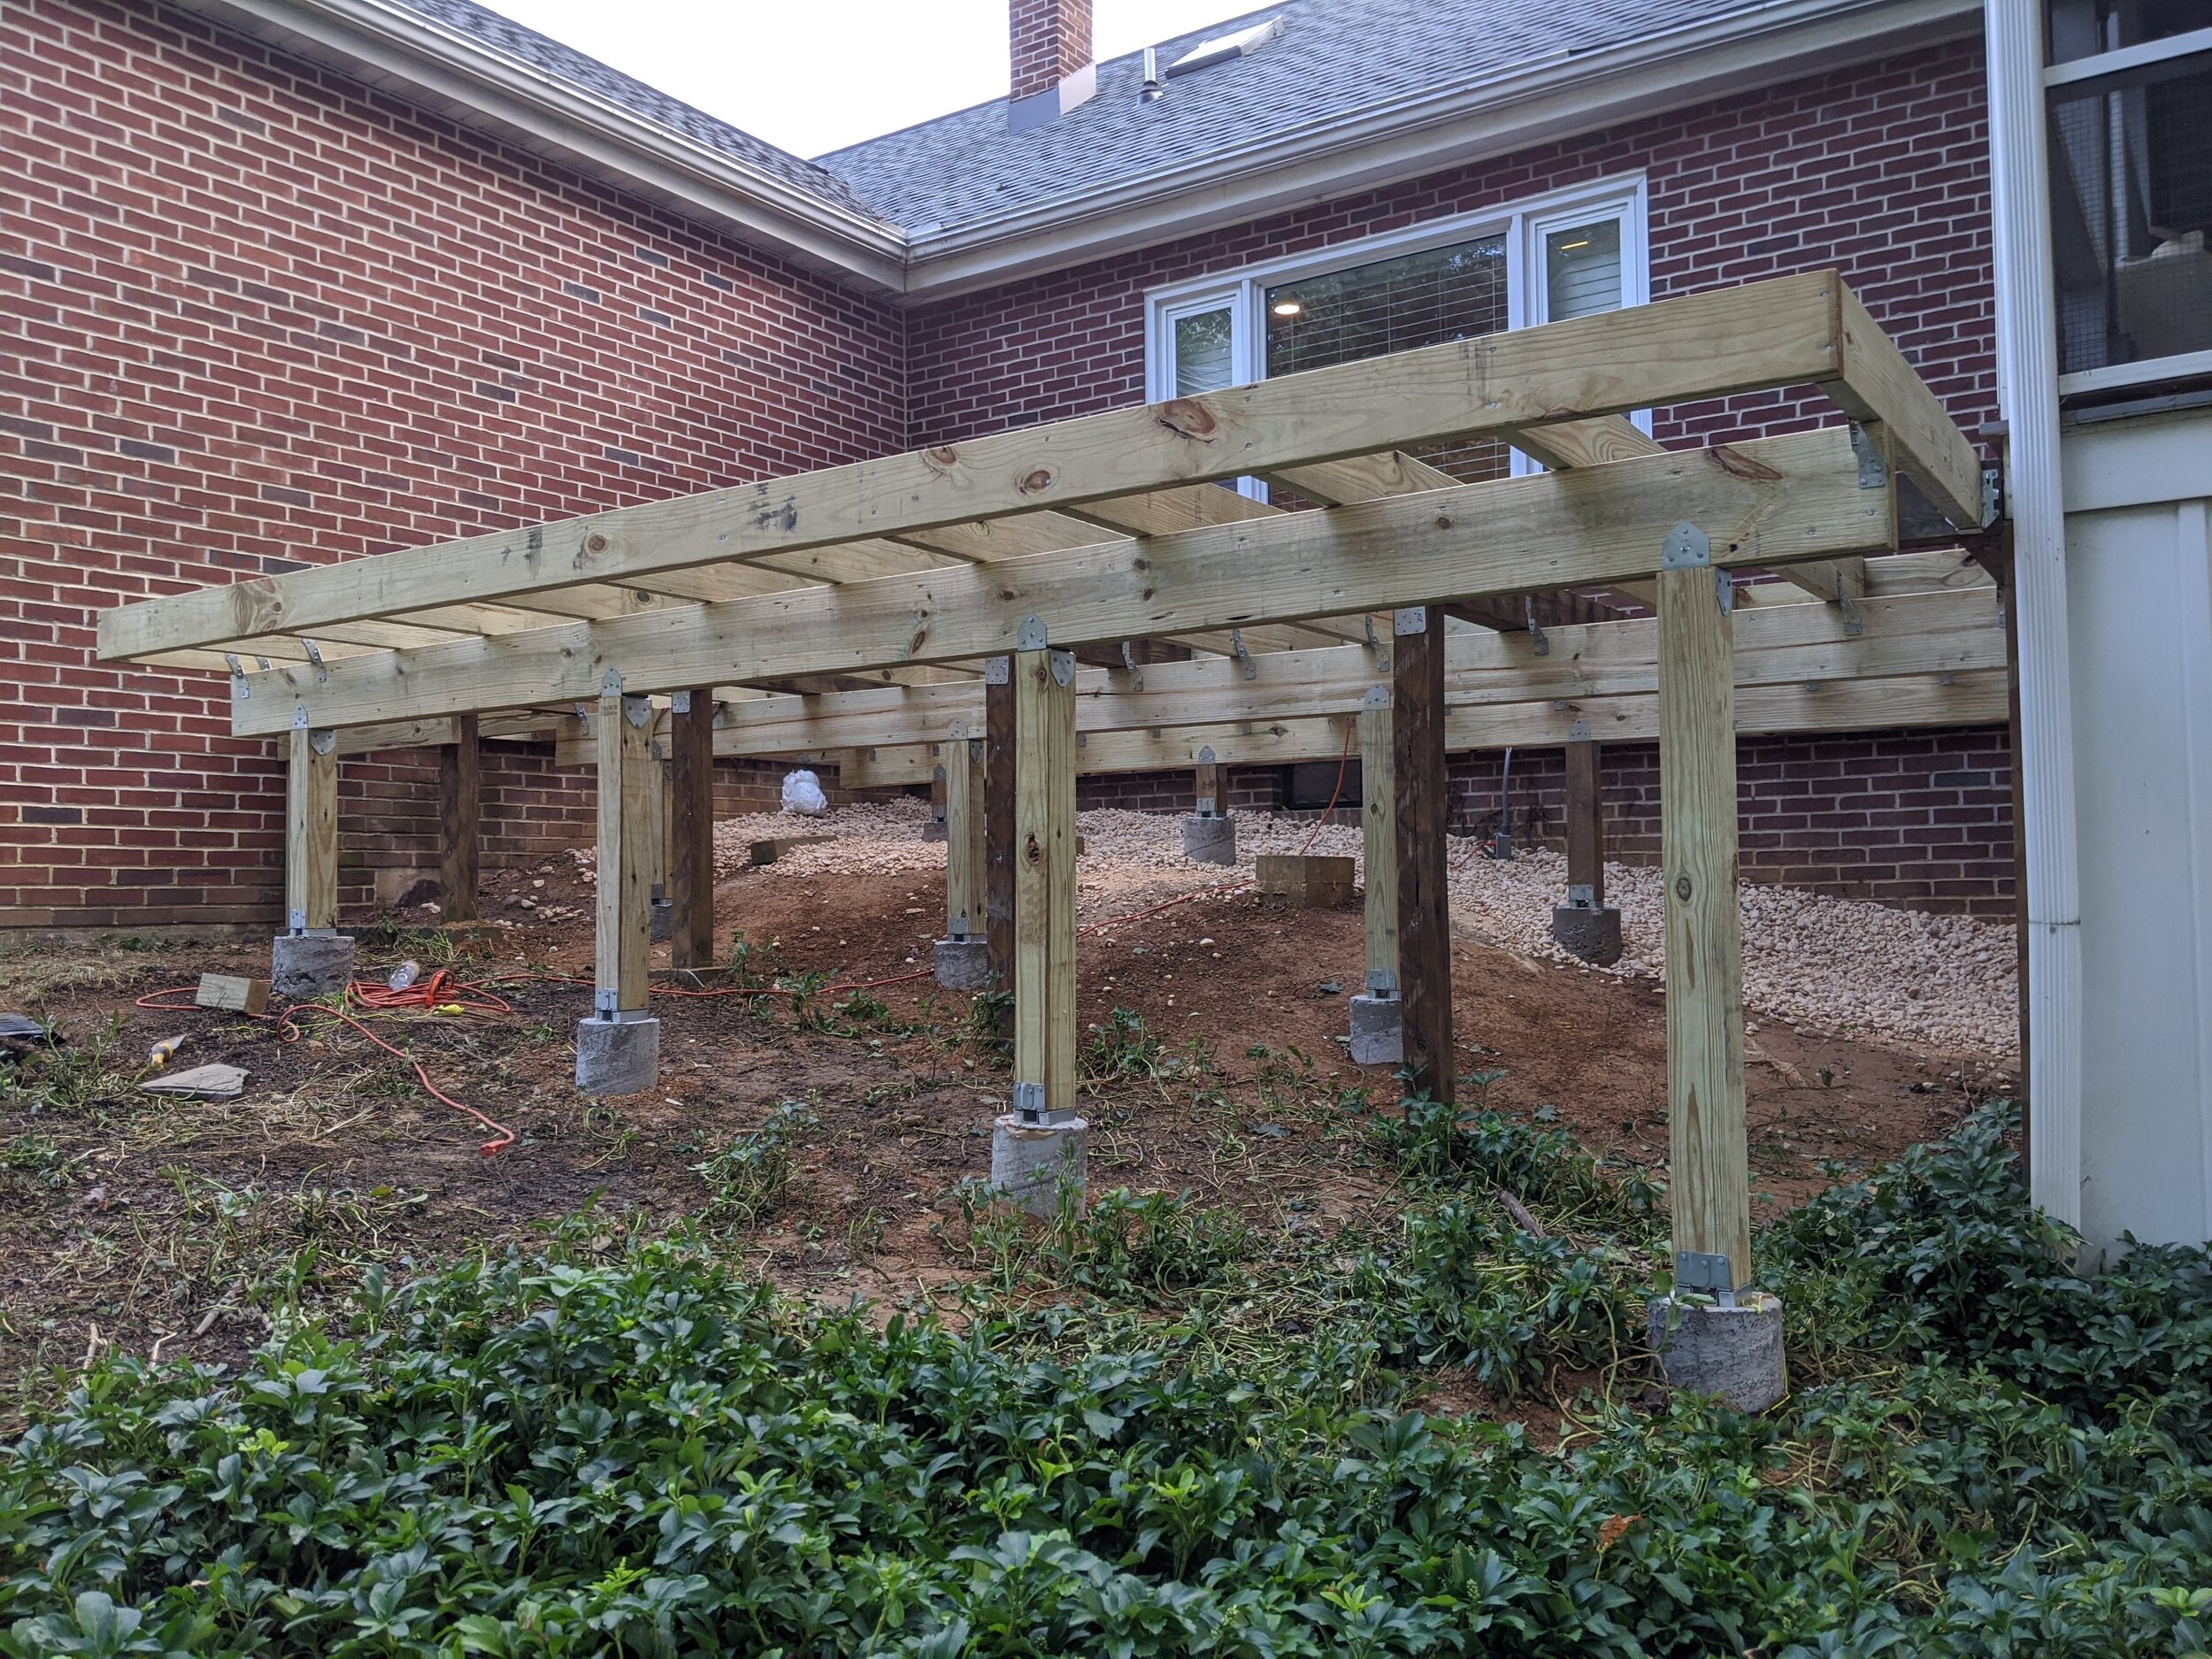
Our three main support beams (marked in orange above) were doubled up/sandwiched 2 x8s.
You can see them here, so nice with the straight lines. Yes, that appeals to me visually so much. The steps in this process were:
Attach the top hardware to the 4 x 4s if you haven’t done that let. They look like little crowns.
A note: Make sure all your vertical 4 x 4s are attached at the bottom — this should have happened in the last step but trust me, you don’t want to march over this beam that weighs like three elephants and find out you missed something.
Get the beam in place. Attach it with hurricane ties (the silver twisty pieces you see)
We placed our end beam 1 foot from the edge of the deck, obviously right over the footers.
(Again, if you didn’t see my note before, we left some of the old vertical supports because it was more work to remove them.)

Once those beams were in place, it was a whole new ballgame. The frame could support us and it was easier to move around.
We started putting in the next set of beams — blue on my drawing above.
This was A LOT of hardware. But I once again found my drawing helpful at the store because I could count the exact number of intersections and ended up with the right number of pieces.
For composite decking, you can go with gaps between 12 and 18 inches (otherwise the boards will sag) but our math worked out best with 12 inch gaps so that’s what we did (since we kept some of the old skeleton as you recall).
My dad was such a good sport and helped us day after day of hammering and cutting. Hi Dad! (waves)
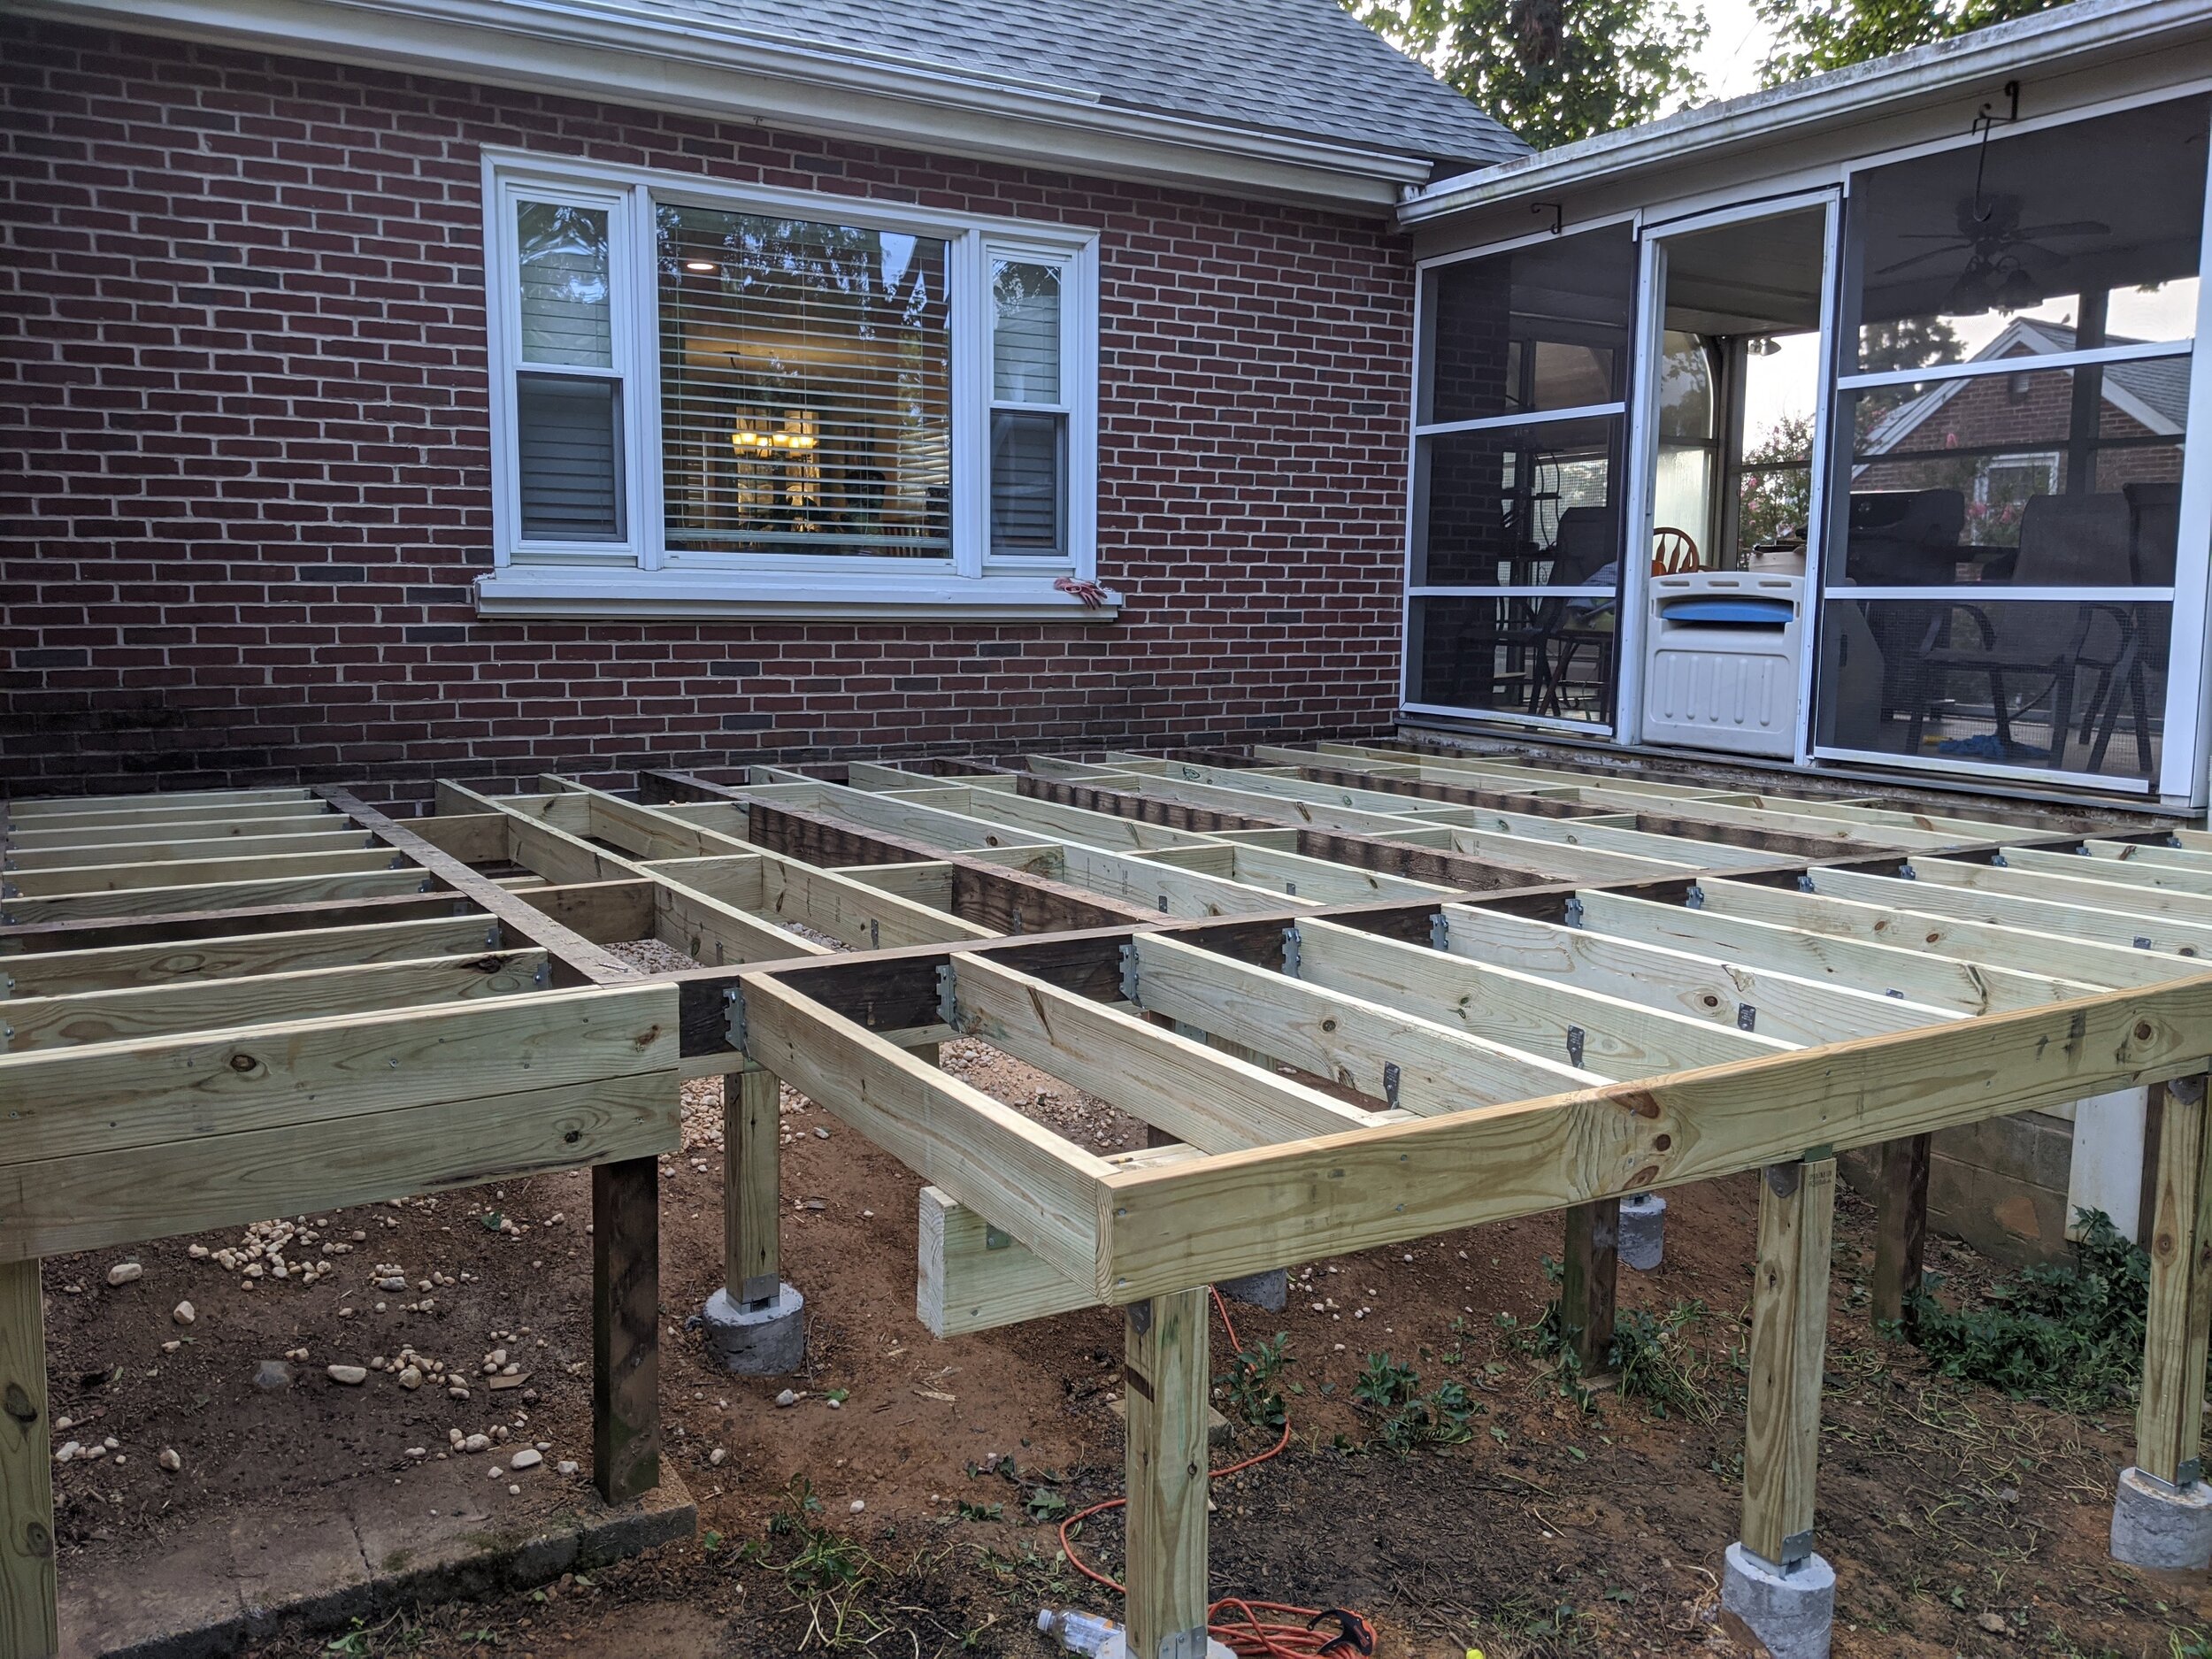
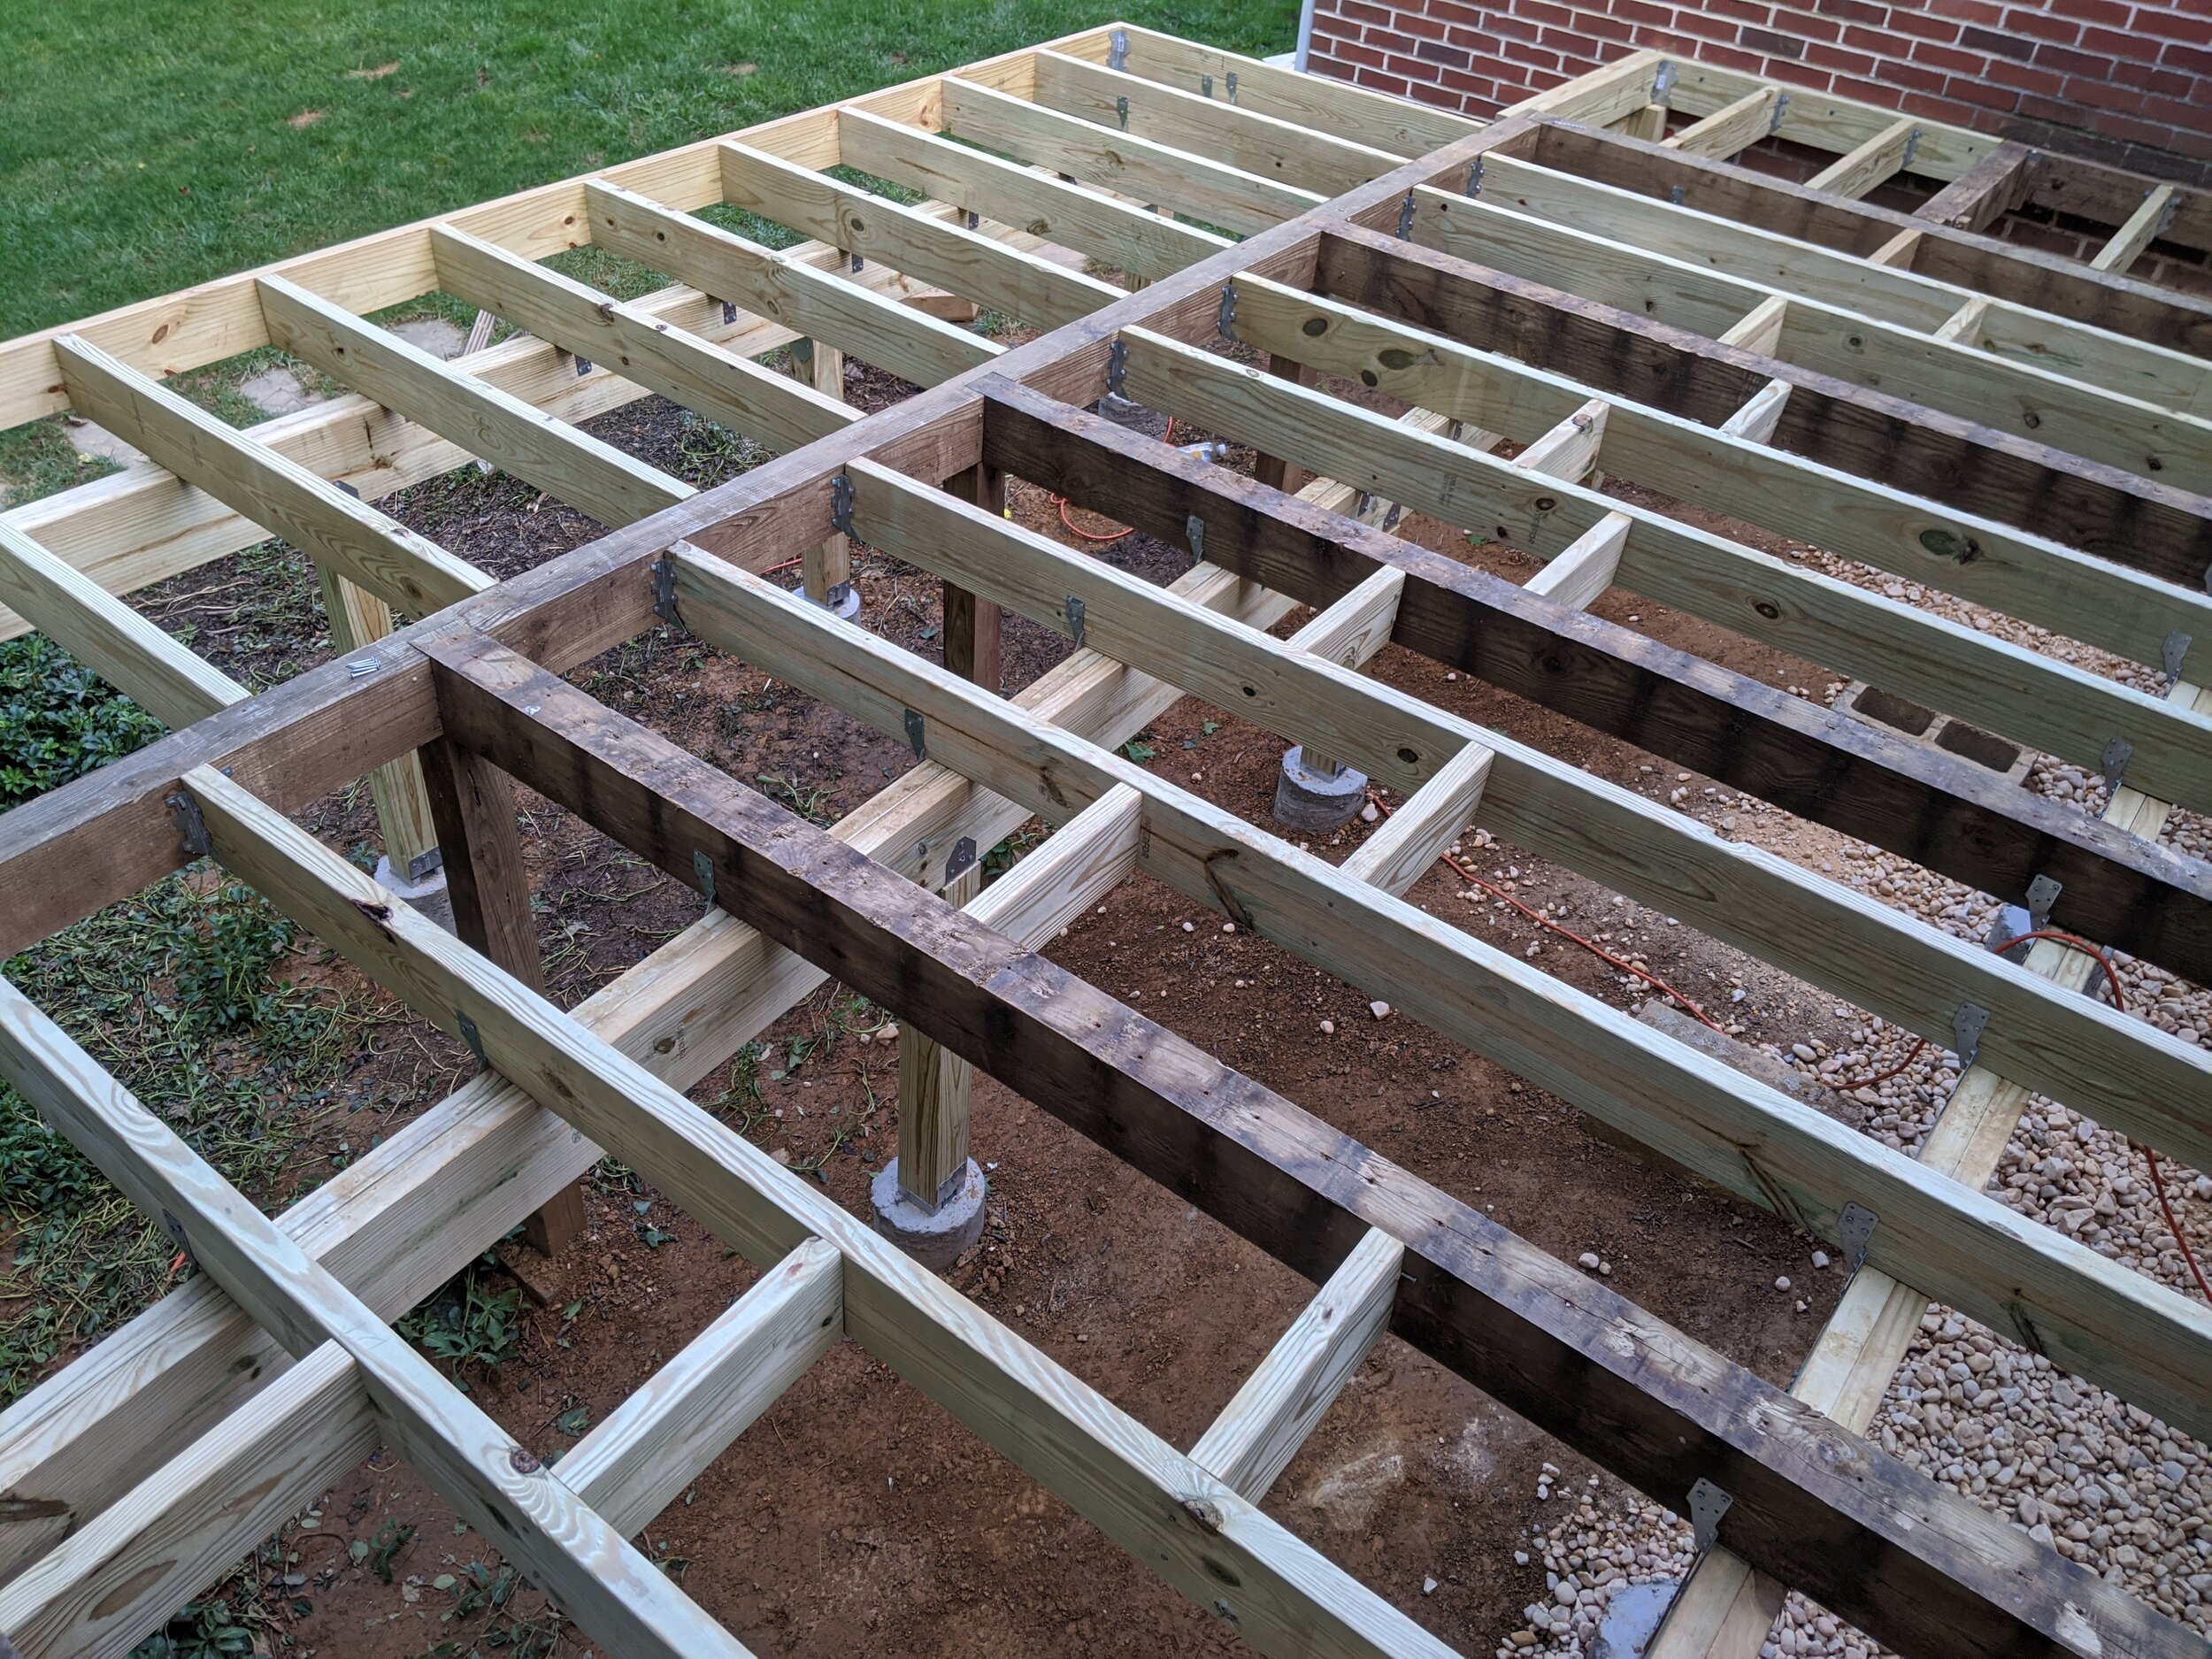
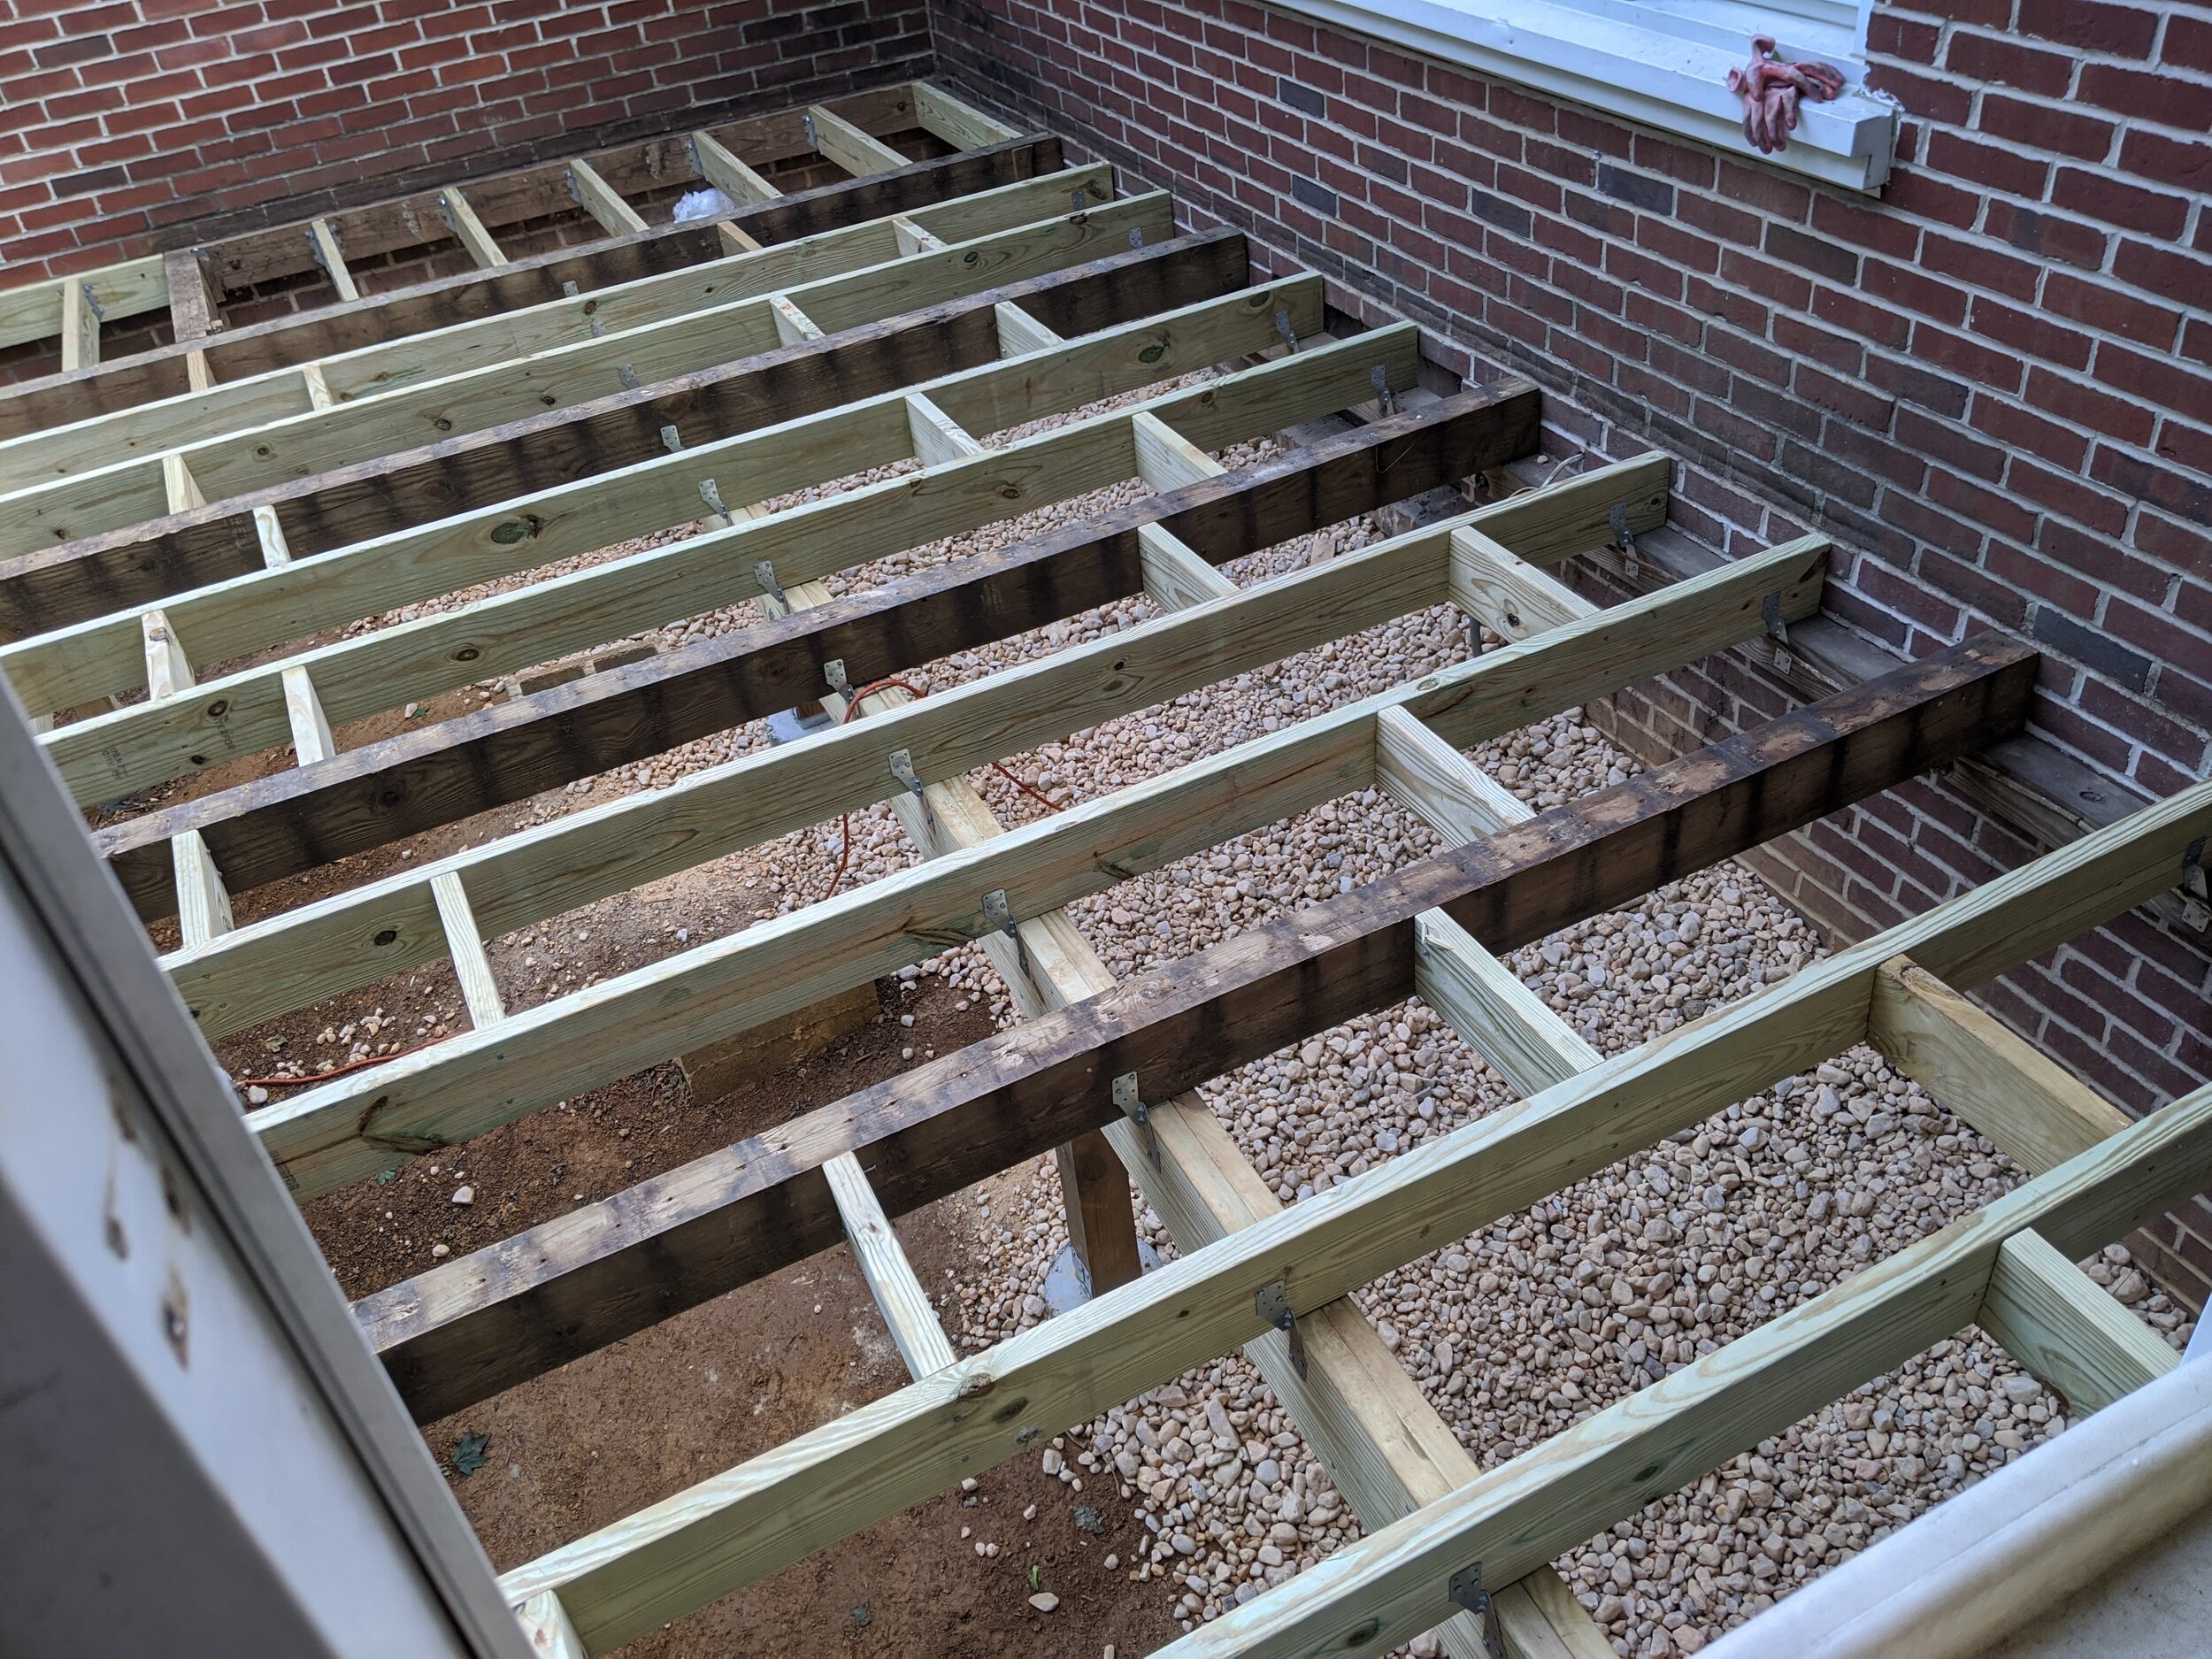
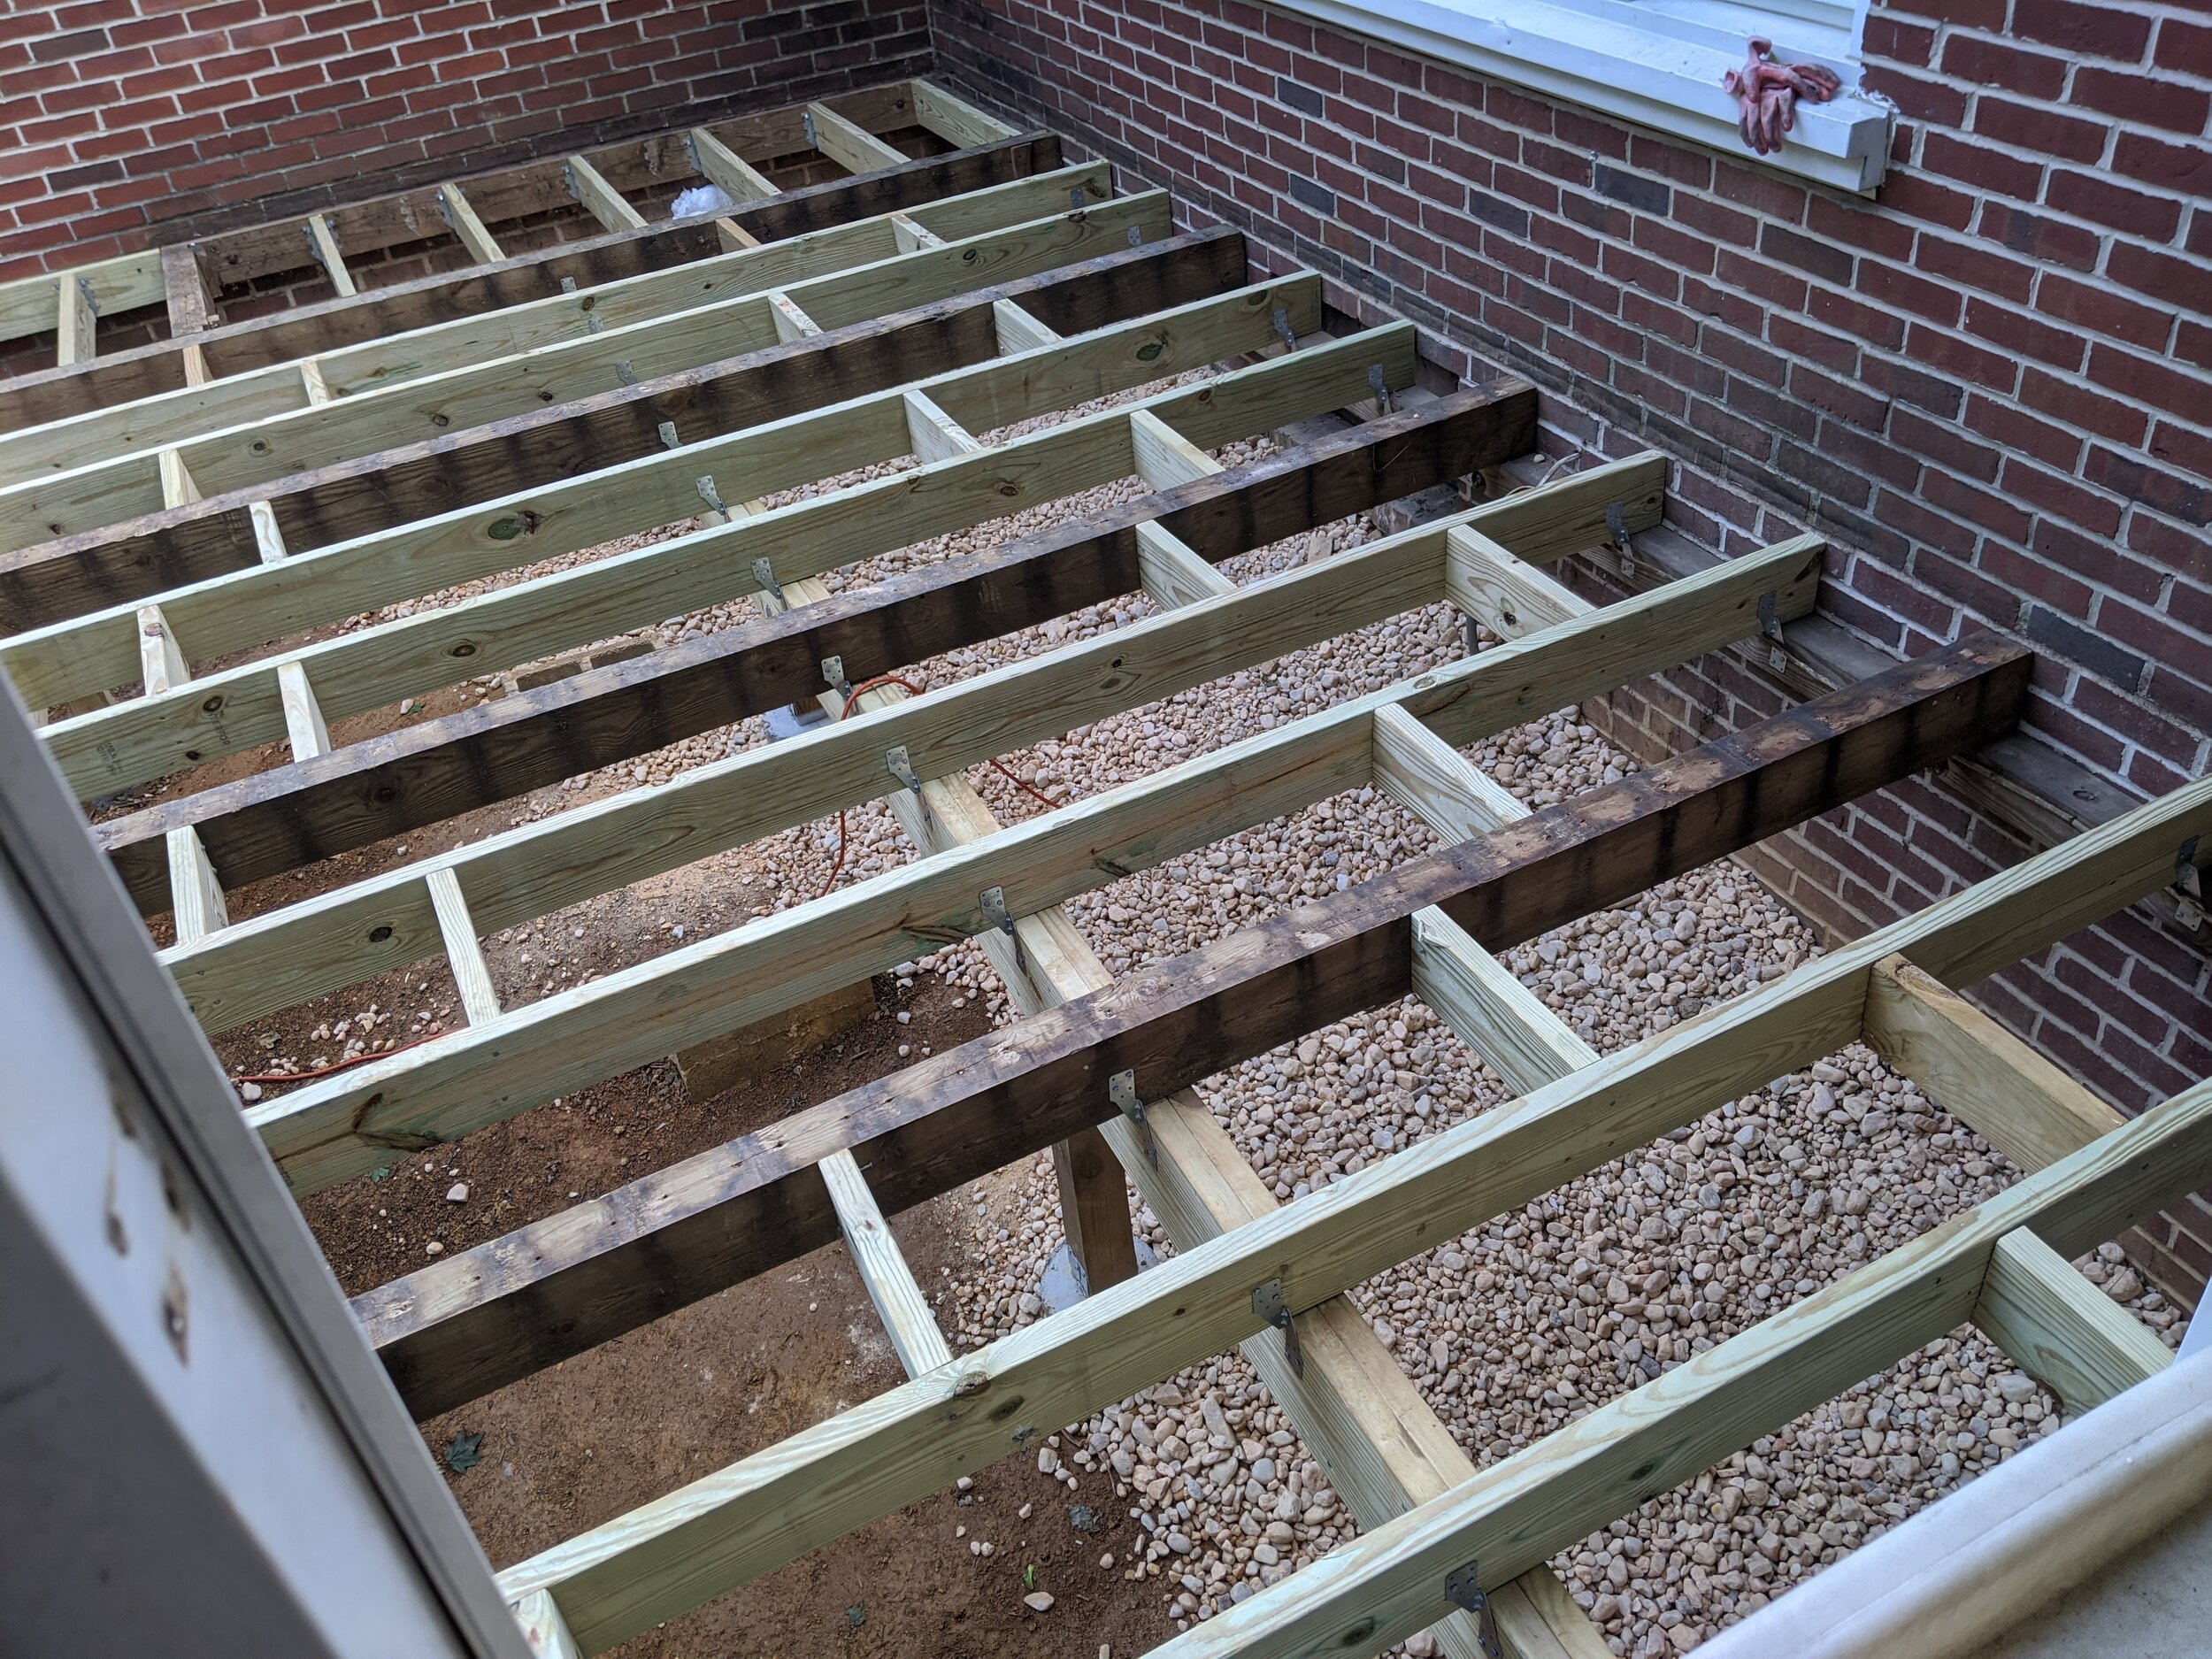

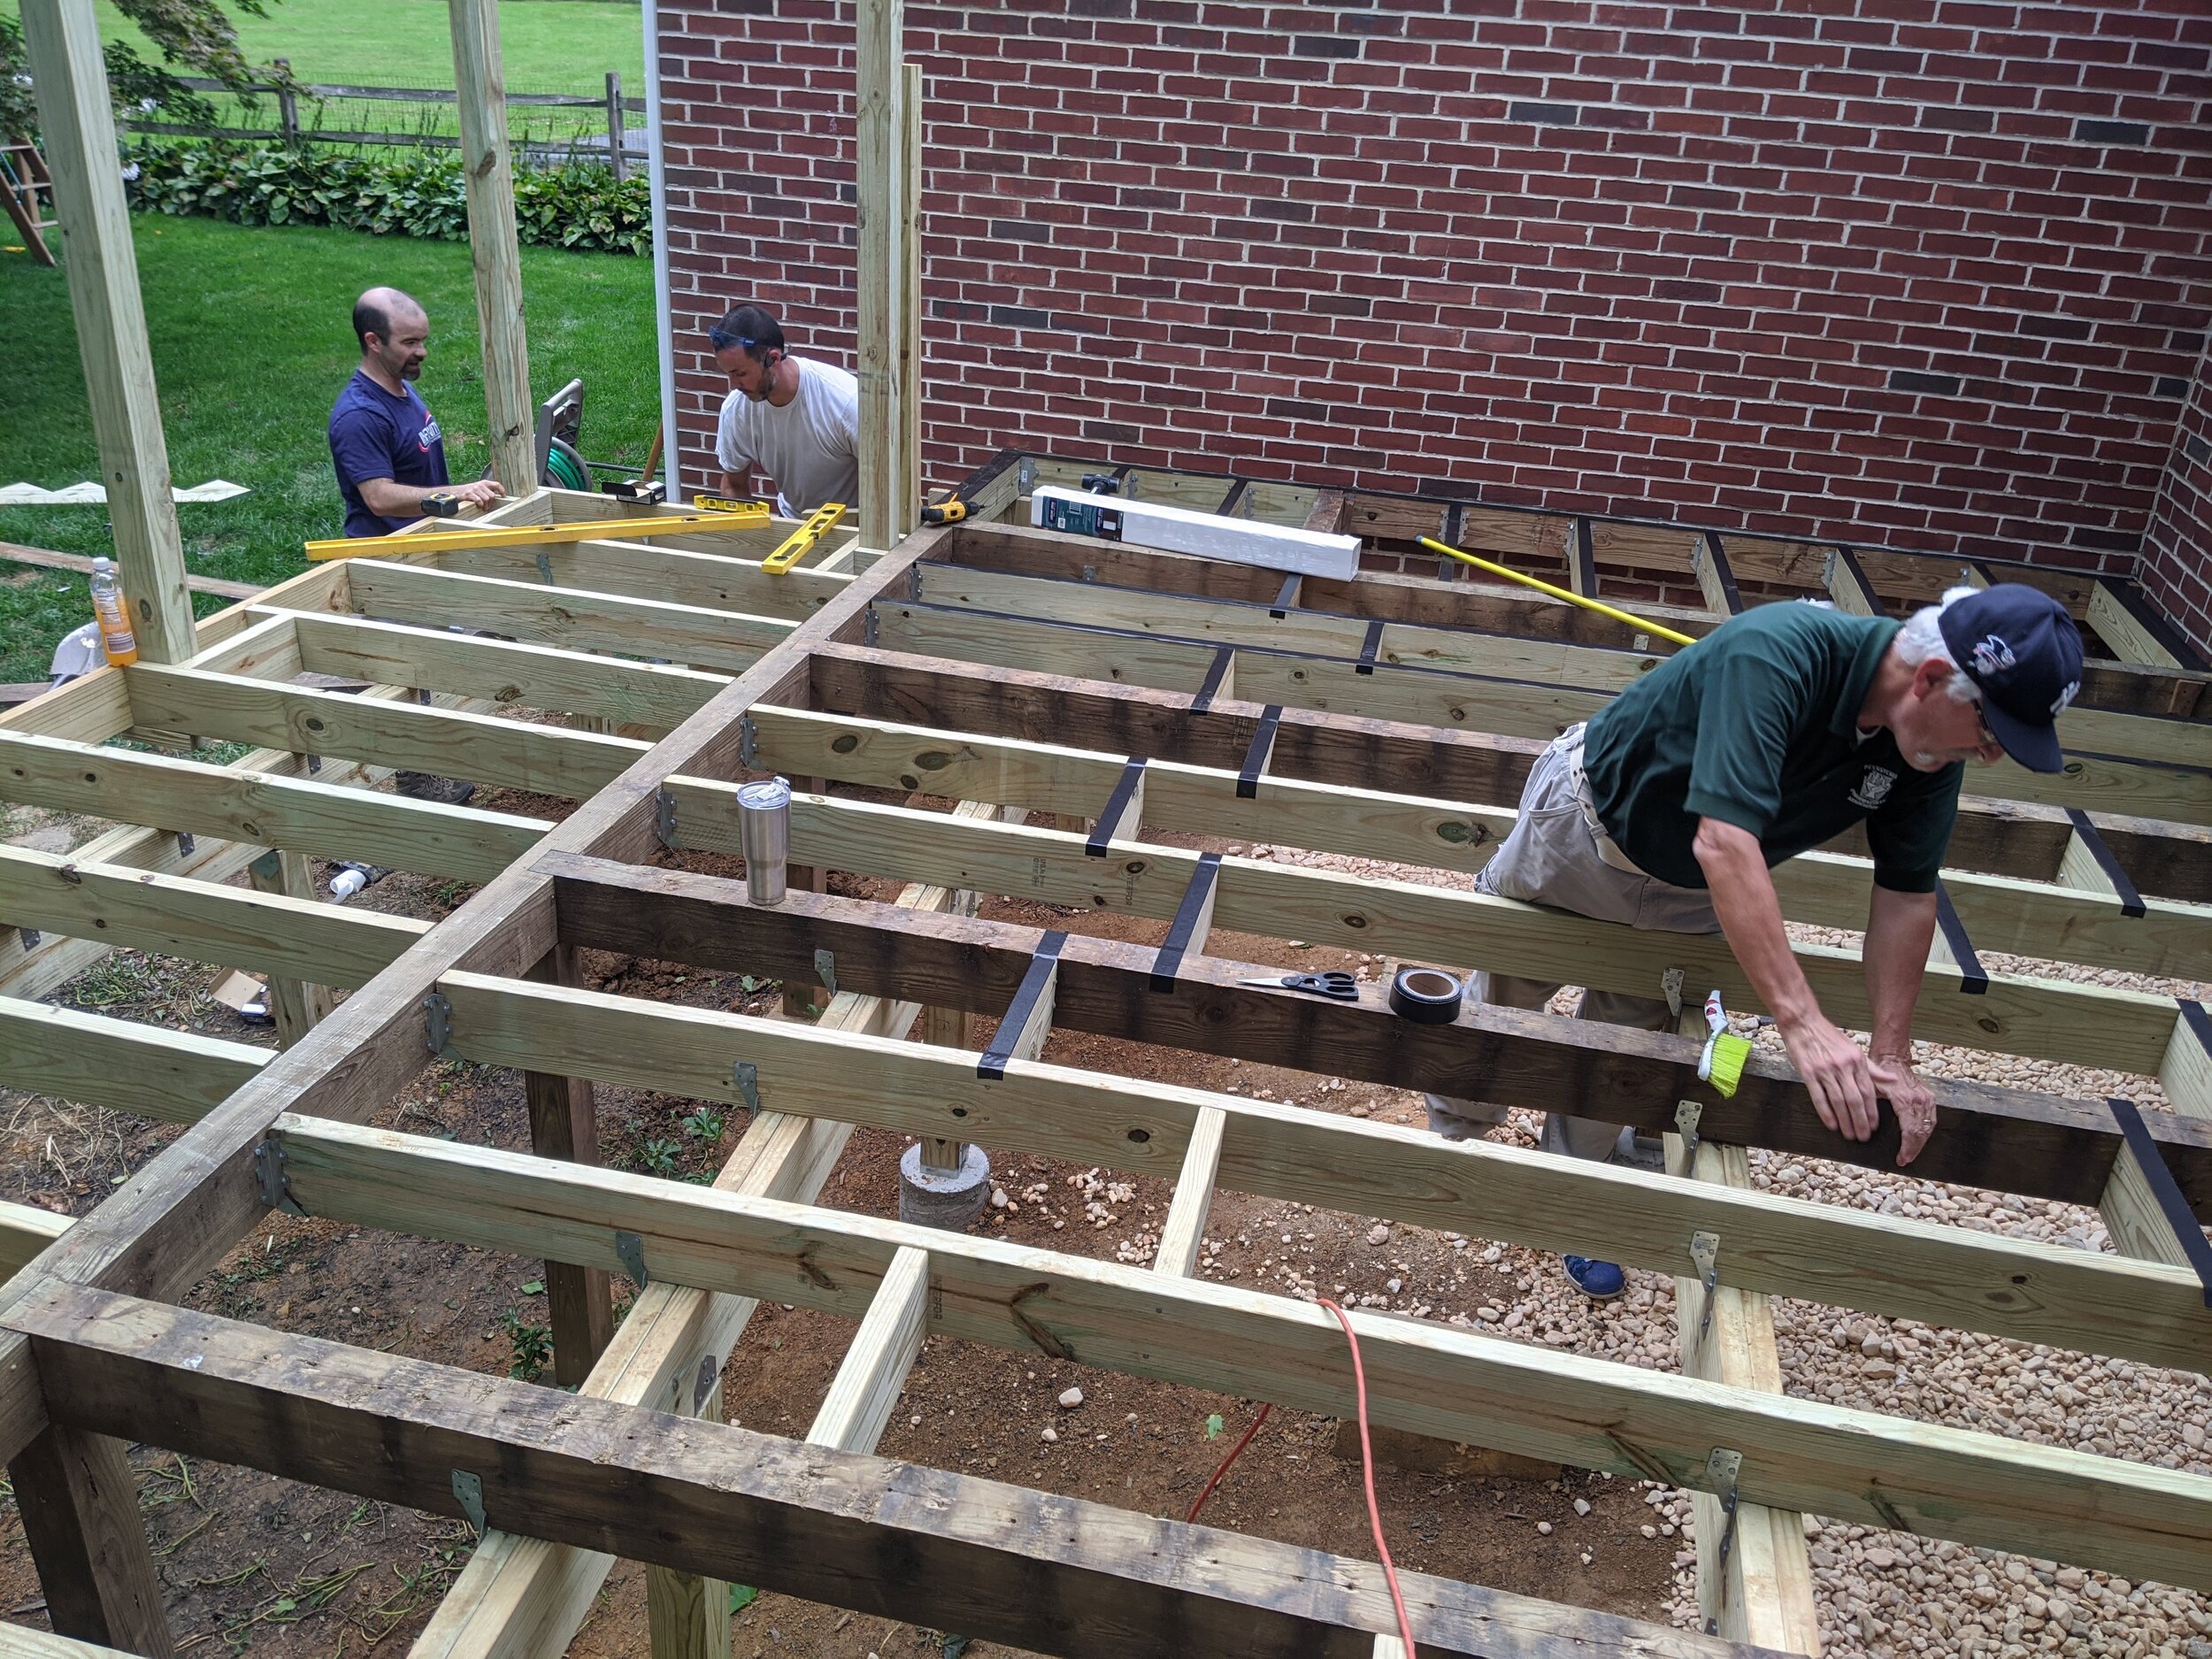
Two things to point out here: hardware on all the intersections that bear weight, but we just nailed in the little studs to keep anything from twisting.
Second key thing — JOIST TAPE. To avoid the wood rotting when it rains, you have to cover all the sky-facing surfaces with joist tape. This stuff feels like something you’d use to roof (kind of tarry) and it serves that purpose. It comes in rolls with a peel-off part on the sticky side. This stuff is expensive but will increase the life of your deck.
Next steps are the stairs and pillars, so keep reading…


