I was walking along the rows of furniture at Salvation Army, knocking my fist along high-pitched, hollow pressboard cabinets talking to my five-year-old when one piece created a deep, solid thud. My ears perked up at the change, and I walked around to the front to inspect the piece. In good shape, but very dated. I opened the first draw and saw a stamp…

Ethan Allen! Thrifting score! To better my luck, it was half-price day. Woo! I brought my treasure home for the low cost of $68 and a texting fight with my husband who said it was ugly and that it would sit in the garage for a year and then get thrown away.
Honestly, it’s probably good he threw (typed) a fit because it inspired me to get started RIGHT AWAY to prove that I was right.
So, with the help of my gracious neighbor (and not telekinesis like I later told him), I loaded it out of the van and got down to business.


After removing the hardware, my first step was a fail, I’ll admit. I knew I wanted to sand it, so I started to sand it. By hand. With sandpaper. Unfortunately for me (but fortunately for anyone who forgot a coffee mug on their Ethan Allen cabinet), with high quality furniture such as this, the finish is so thick, I barely made a dent. I was using coarse grit sandpaper, too! I did the entire thing… and it looked the same. I even made a trip to Home Depot (the first of three that day!) to get more coarse sandpaper.
Eventually, I remembered we had a rotary sander and a belt sander in the workroom, so I adjusted my Wonder Woman tiara and pulled them out. It was getting dark by this time, so along with the earplugs, I plugged in a work light. I was essentially Ron Swanson with all of the snark and know-how but none of the mustache.
NOW the finish and the stain were coming off successfully. I tore the belt on the sander thanks to weird TEENY TINY square hex screws on the hinges that I couldn’t get off, but I went BACK to Home Depot for another belt. Again, I am woman, hear me roar. It’s fun to walk in there covered in sawdust. No one offers me help when I’m filthy the way they do when I enter in a blouse with skinny jeans and towing children.
So, with a new belt and with the discovery that the rotary sander was really only good for smaller areas the belt sander wouldn’t fit, I skinned that beast. (I regret that sentence. Sorry. Gross, Kell.)


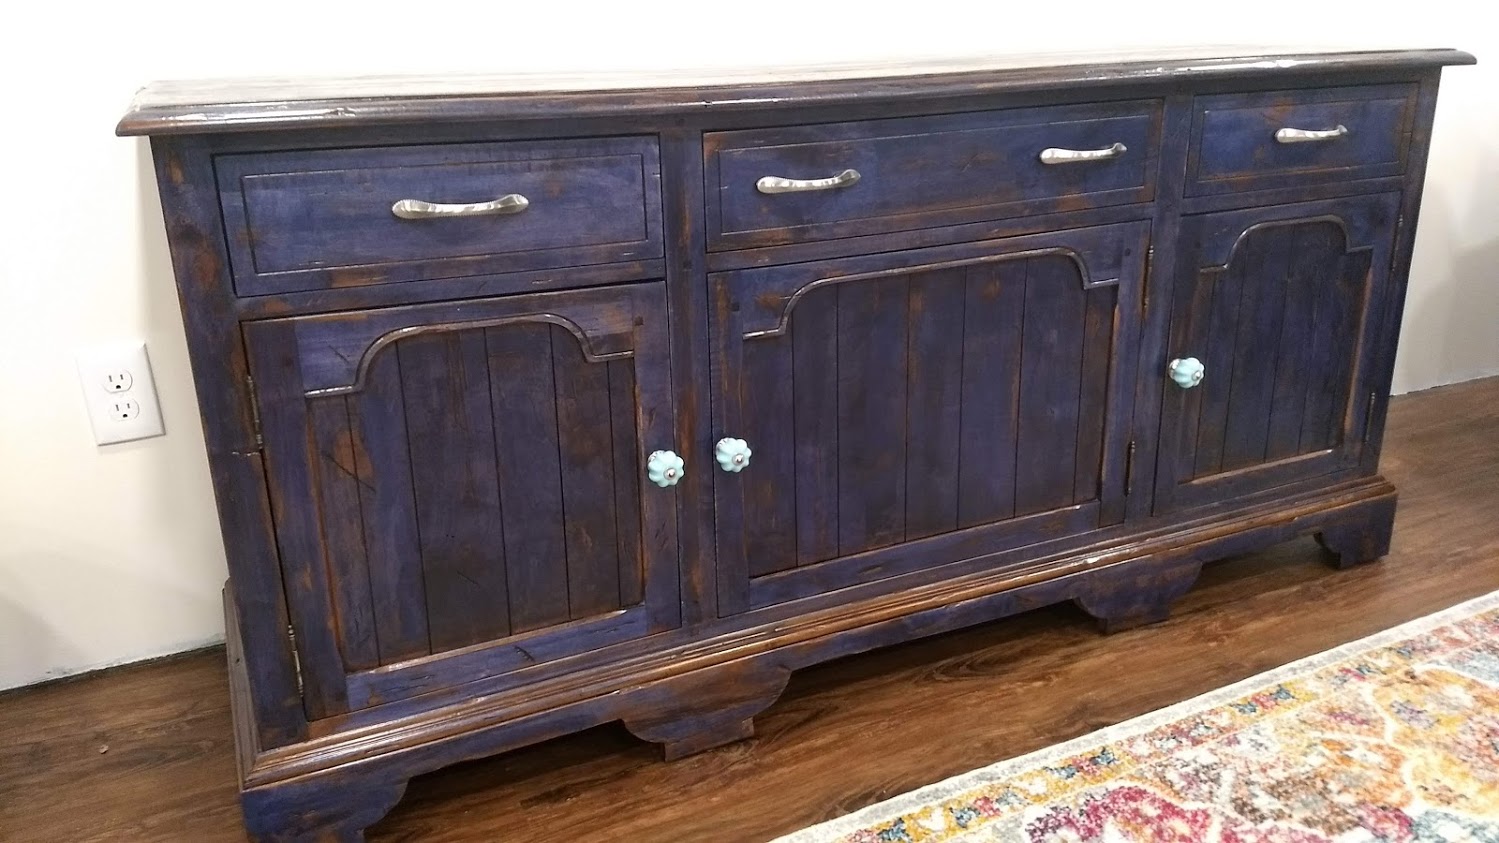
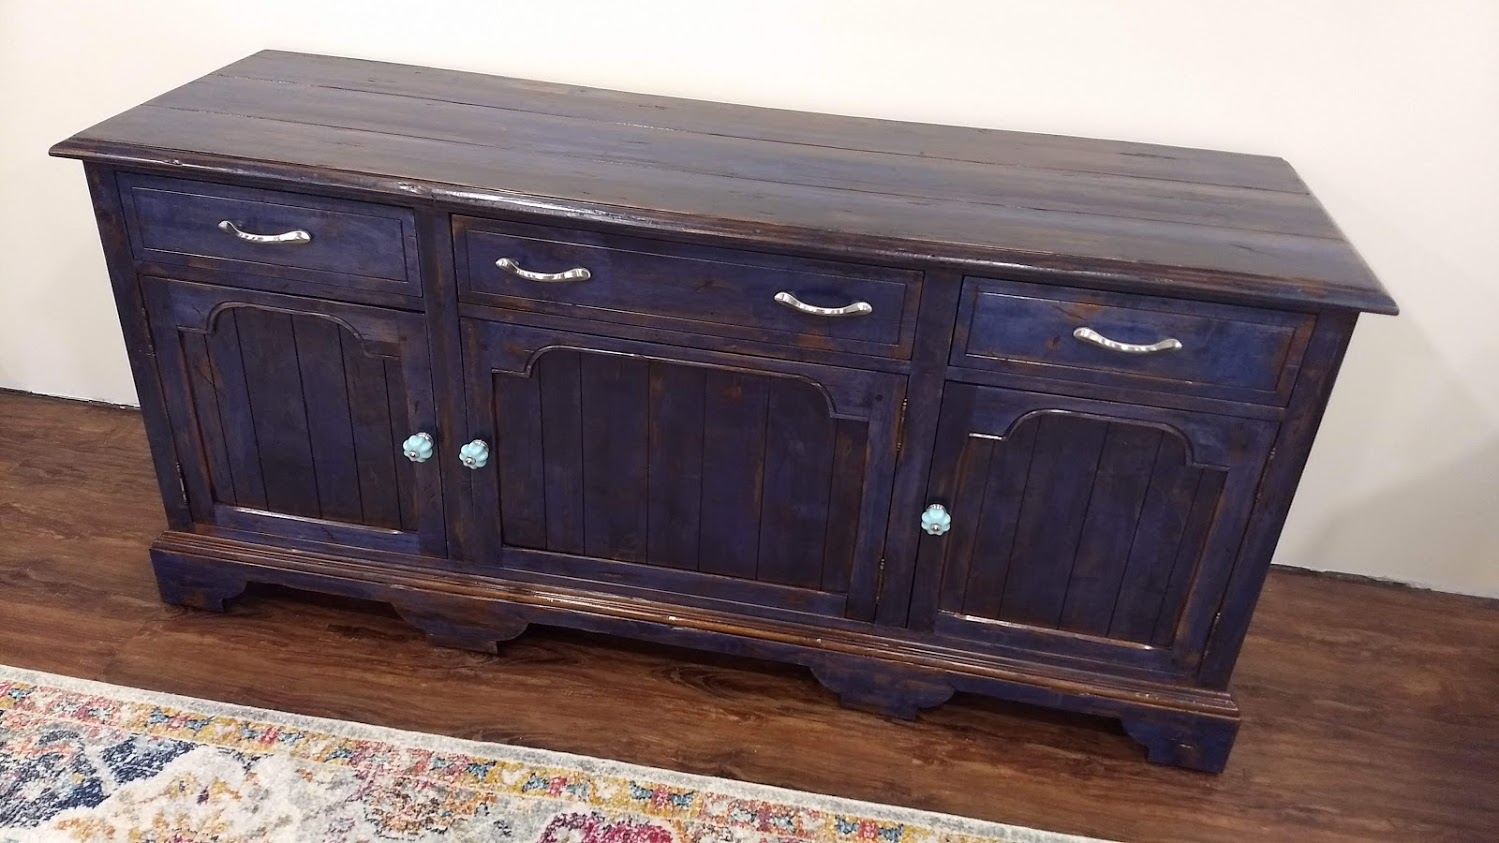
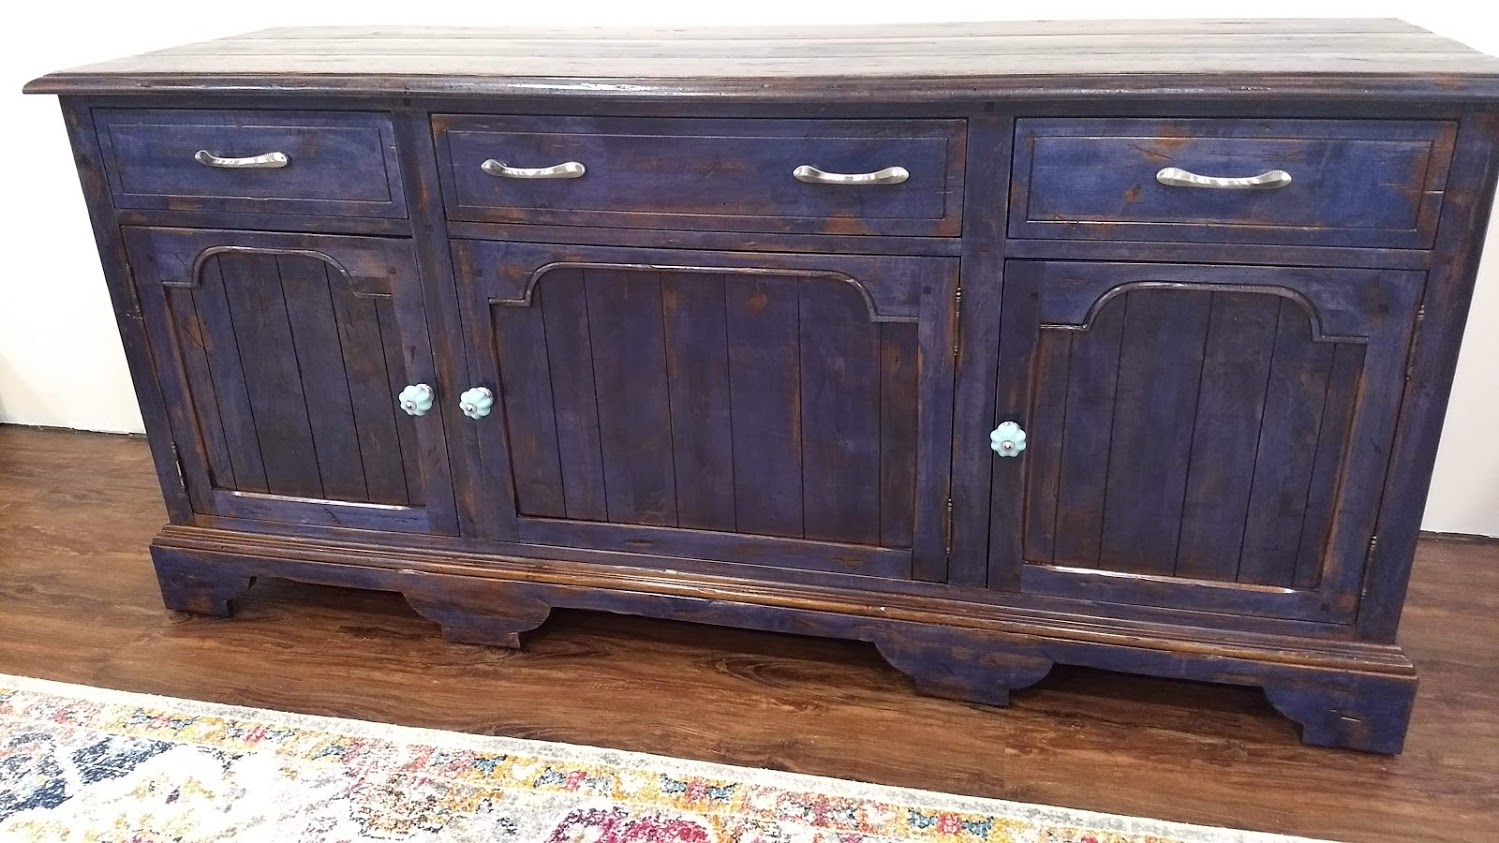
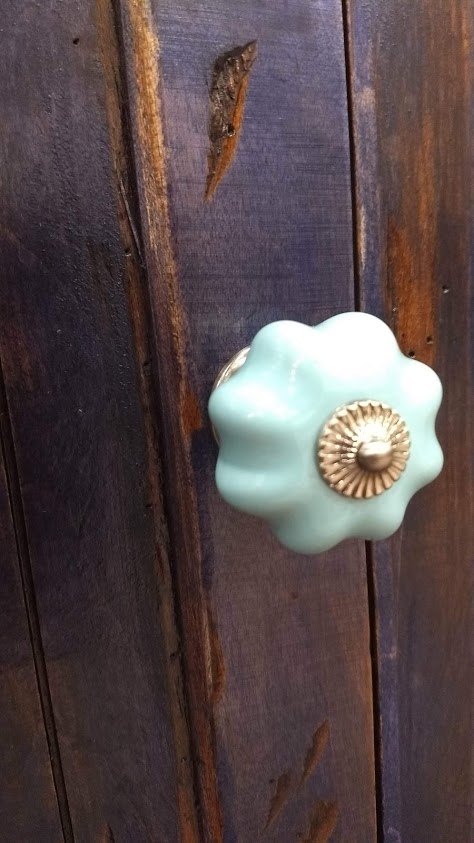
I was so pleased with how the “worn” look of the cabinet stayed and that the finish came off unevenly. It was certainly creating the look I wanted. On my second trip to Home Depot, I stopped by the paint section and picked out an intense blue that I hoped would coordinate with my rug. Also, I had to maintain my Ron Swanson-ness (but barely) when I found this amazing hardware that basically looks like it was made to coordinate with the rug. Thrills!


Also, a brief sweet moment at Home Depot. I use talk-to-text all the time, so while standing in the aisle waiting for the stain to mix, I hit my phone and asked my husband “do-you-have-polyurethane” and a moment later a confused-looking older gentleman reached out a can and said, “I don’t work here but I think this is what you need.” I thanked him and explained I was just asking my husband something on my phone, at which point he smiled a ‘whatever-future-lady’ smile and walked away. Giggles.

Thanks to a very hepful gal at the paint counter, I left with this stain and hubby confirmed he had poly at home I could use for the final coat.
So, after a REALLY good cleaning with soapy water to be sure all the sawdust (man-glitter) was gone, I took a deep breath and opened the stain. It. Was. Really. Bright. But I was determined that the vision I had in my mind was good, and I just needed to pursue it. I used the foam roller per the Home Depot paint counter person’s recommendation and wiped with a ever-growing pile of old t-shirts.
The first coat gave me the happy squeals. The color was EXACTLY what I wanted. I decided I wanted it a little deeper, though, so after it dried, I repeated with a second coat the next day. Lots of happy dancing and triumphant “SEE?”-s yelled at my hubby.


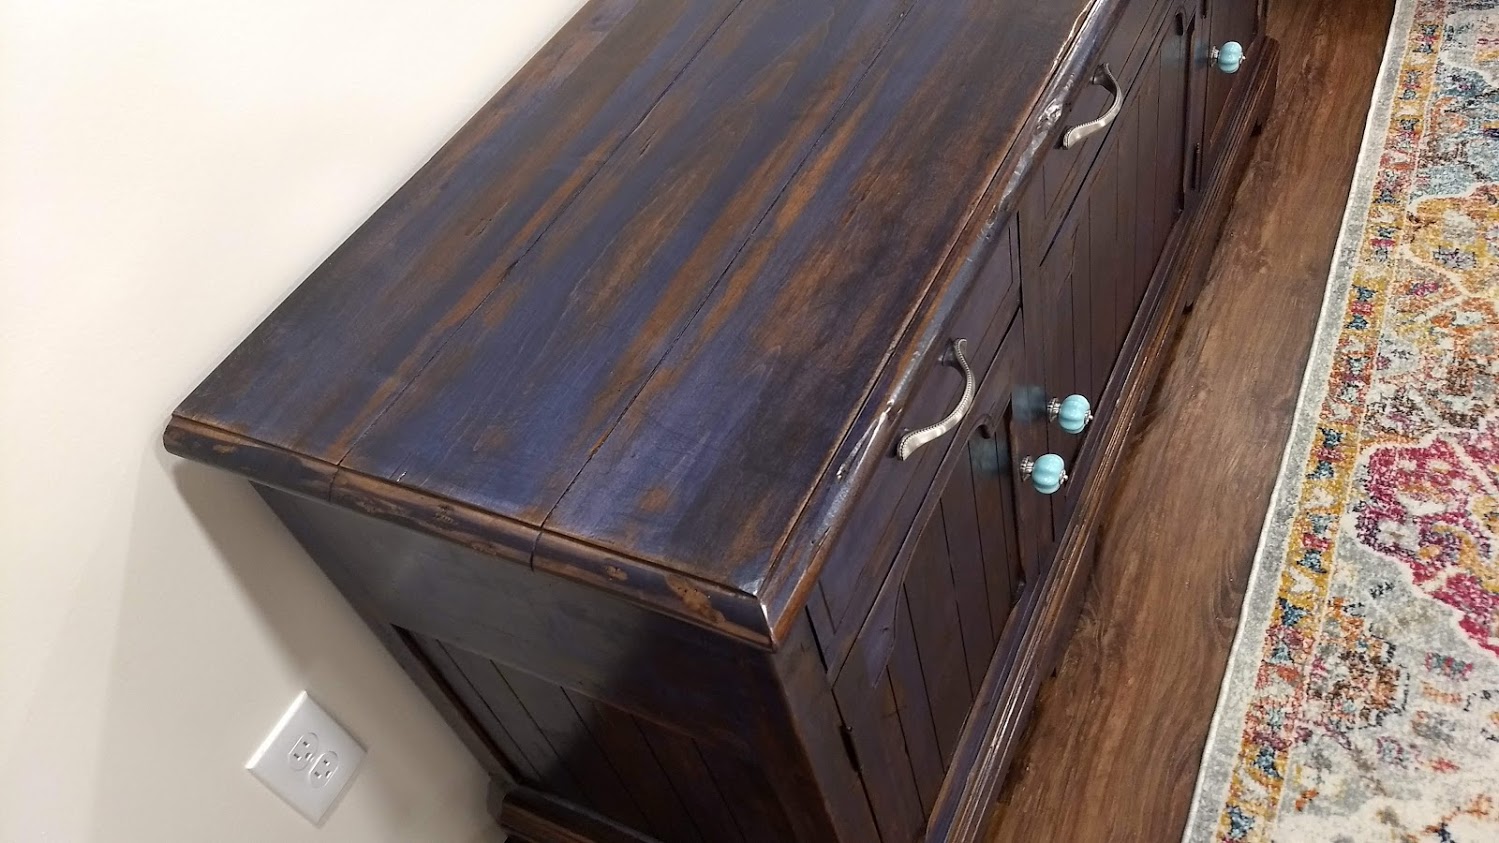
I was (and still am) so insanely happy with the worn look this gave me. Since the piece was clearly designed with a ‘worn’ look, I didn’t want to take the entire piece down to the bare wood. Leaving the dark spots achieved a ‘barn find’ kind of look that’s really popular. This is exactly why I did stain instead of paint.
So, after everything was blue (except my hands because I brilliantly remembered to wear gloves), I started on the polyurethane. This was the most nerve wracking part of the process for me. If you’ve ever worked with this stuff, you know that it looks amazing and then when you come back, there’s a million drips and it looks like a drunk monkey did it. Boo! Painstaking process but I completed the first coat (with only a few dog hairs in it), rubbed it down with steel wool, then layered on the last coat on the fourth day.
When it was dry, hubby (who was by this point converted to the belief that this was, after all, a good idea) helped me carry it into the newly remodeled family room for which this was my contribution. It looked so great with the carpet (cue more happy dancing)—I couldn’t wait to add the hardware as the finishing touch!
At his suggestion, we used lock-tight stuff to make sure the kids wouldn’t twist the knobs off. Voila! Done! Four days of hard work and just over $110, and I have a cabinet I love. Super proud of this one.